Connect to your Mailchimp audience
- Click on the Publish icon located at the top-right corner of the editor.
- Select the Mailchimp tab and then click on the Login to Mailchimp button.
- Login using your credentials, and click on the Allow button to grant access to Mason to access your Mailchimp account.
For a bulk generation of creatives, you have to link the layers/elements of the project creative to the audience attributes (aka Audience Fields). To do this, you have to select an audience first.
- Open the project and go to the page which has a base creative.
- Now click on the Data connector icon in the editor and select Mailchimp in the modal.
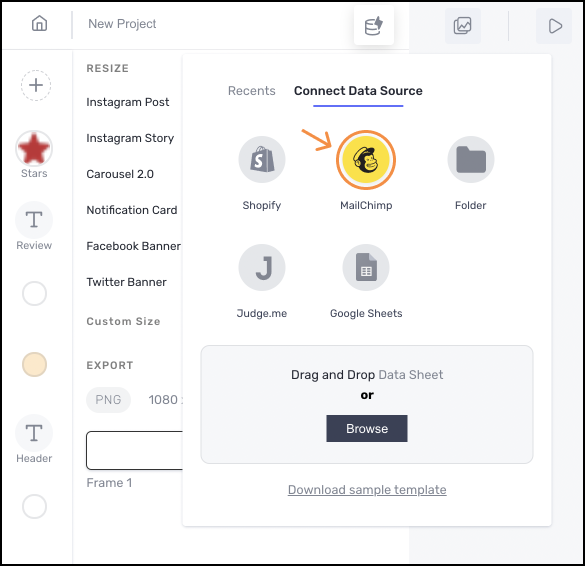
- Select a Mailchimp Audience from the list of the audiences.
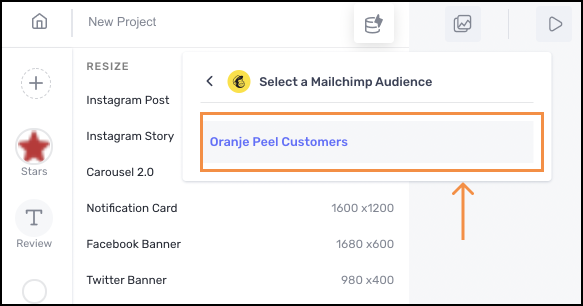
Link audience fields in Mailchimp audience to layers in a project creative
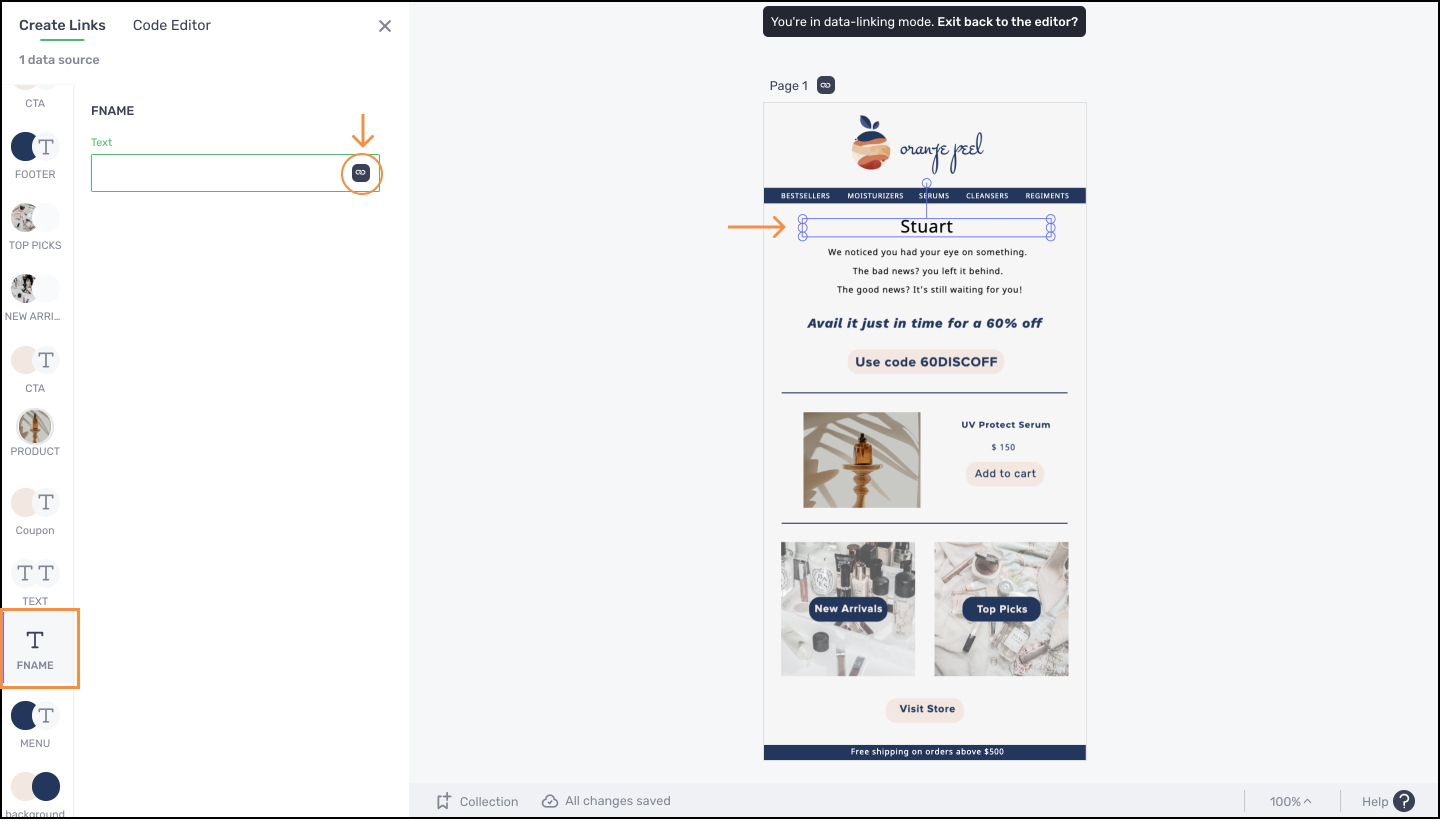
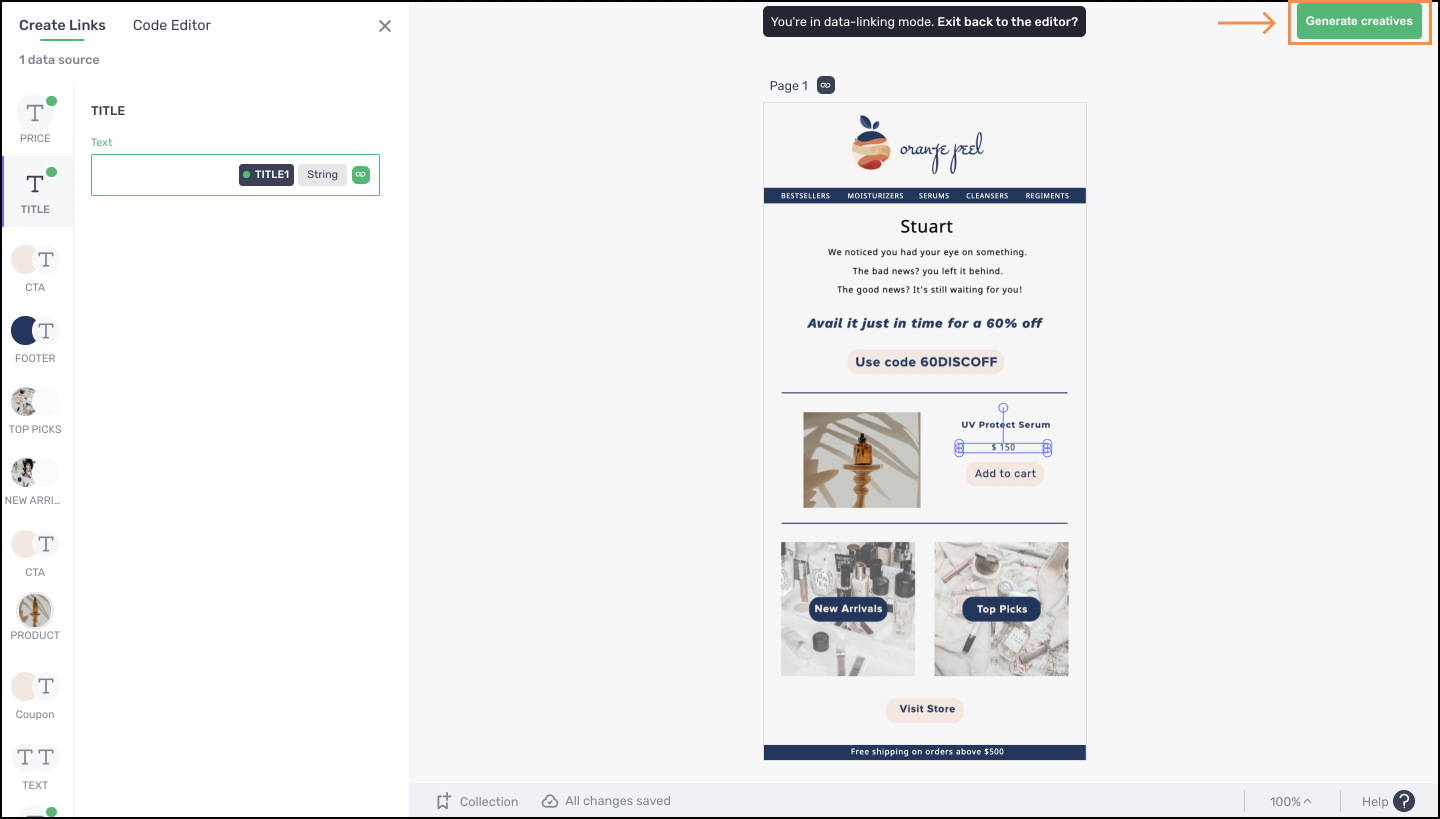
*After connecting your Mailchimp audience, you head into a data-linking mode**
Here you can start linking the audience fields (basically the customer/user attributes with the corresponding layer/element of your creative through the following steps:
- Click on the layer you want to link on the sidebar and then click on the 🔗 icon.
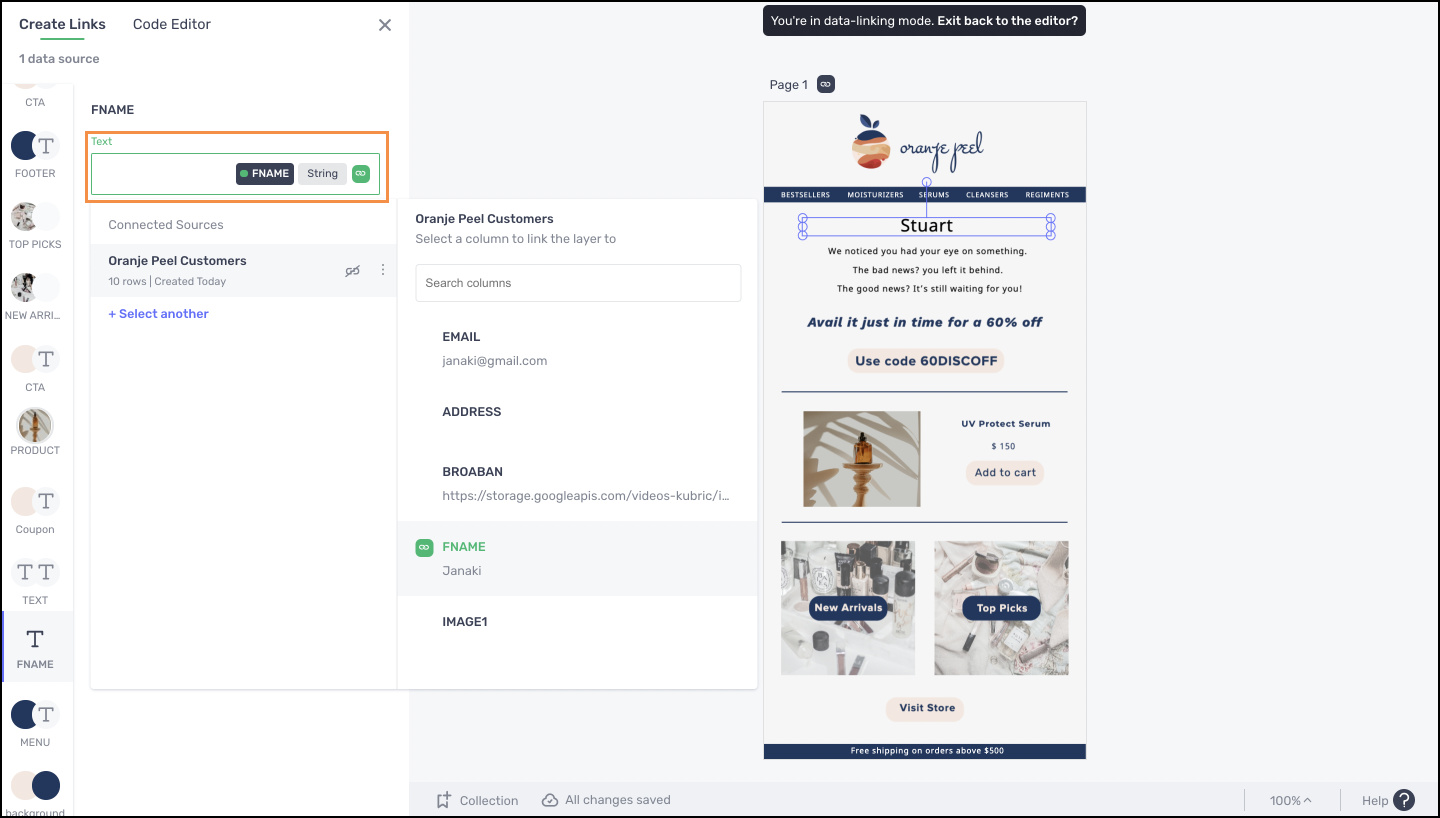
- Now click on the column you want to link in the dialog box that has the list of all your audience fields.
- Once linked, the audience field name is shown in the textbox along with the green link icon indicating that the selected layer has been linked.
Repeat the above 3 steps for other layers/elements you want to link before you hit the Generate creatives button to initiate the bulk generation process.
Updated 4 months ago
