Connect to third party APIs
Learn how to setup your first data source in mason.
Import CSV/ Google sheets to Mason
Here's how to connect your google account to access your google sheets-
Your Google sheet is now connected successfully. Start linking the columns in the sheet with the corresponding layers/elements in your project creative now.
Pro Tip
- For generating creatives in bulk, each row in your google sheet will have data related to each creative.
- You have to link the columns in your Google sheet to the corresponding layers/elements in the creative in Mason.
- So, to avoid any confusion, please ensure that the column headers in your Google sheet and the layer names of your creative in Mason are the same.
Shopify 🤝 Mason
- Click on the Publish icon located at the top-right corner of the editor and select the Shopify tab.
- Enter your store name (if oranje-peel.myshopify.com is the store URL, then 'oranje-peel' is the store name) ****
- Now click on the Connect to Shopify button.
Once you connect Mason to your Shopify Store, you can
-  use the product catalog as a connected data source

-  import the product images from the catalog into your creatives

-  enable Mason to create and update product images in your store
Mailchimp 🤝 Mason
To connect your Mailchimp account -
- Click on the Publish icon located at the top-right corner of the editor.
- Select the Mailchimp tab and then click on the Login to Mailchimp button.
- Login using your credentials, and click on the Allow button to grant access to Mason to access your Mailchimp account.
Once you connect Mailchimp, you can use it to bulk generate creatives
You can now link the layers/elements of the project creative to the audience attributes (aka Audience Fields). To do this, you have to select an audience first. Let's do this -
- Open the project and go to the page which has a base creative.
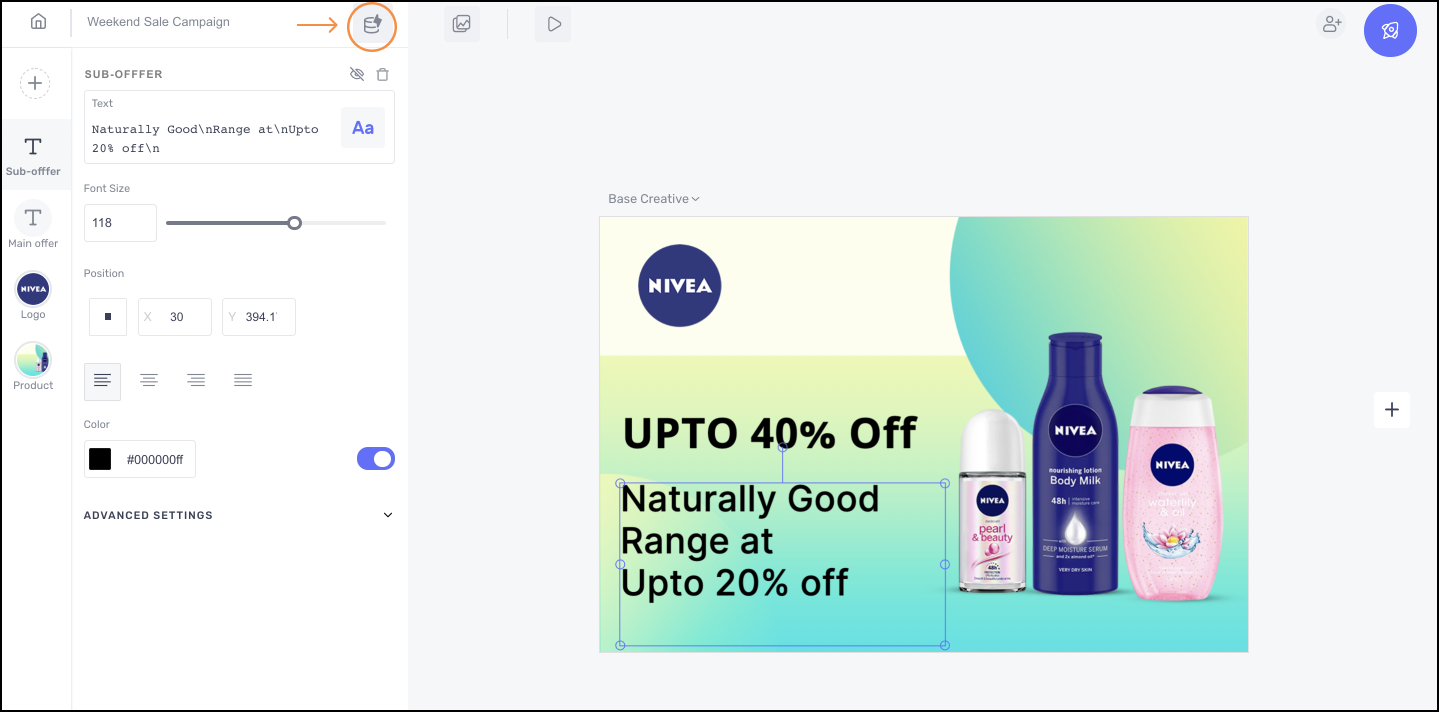
- Now click on the Data connector icon in the editor and select Mailchimp in the modal.
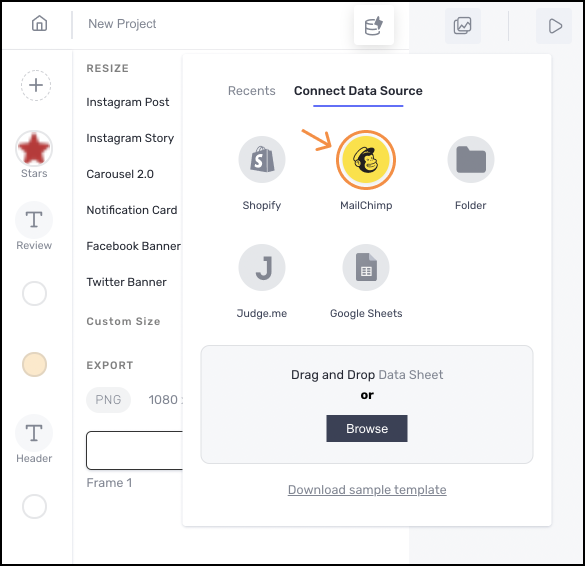
- Select a Mailchimp Audience from the list of the audiences.
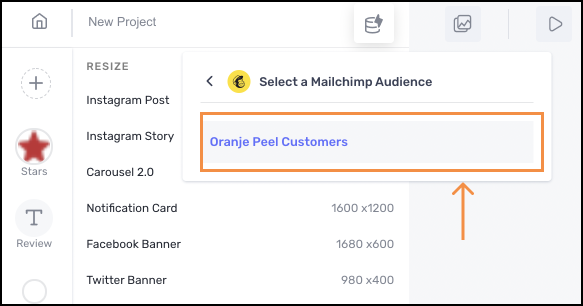
-
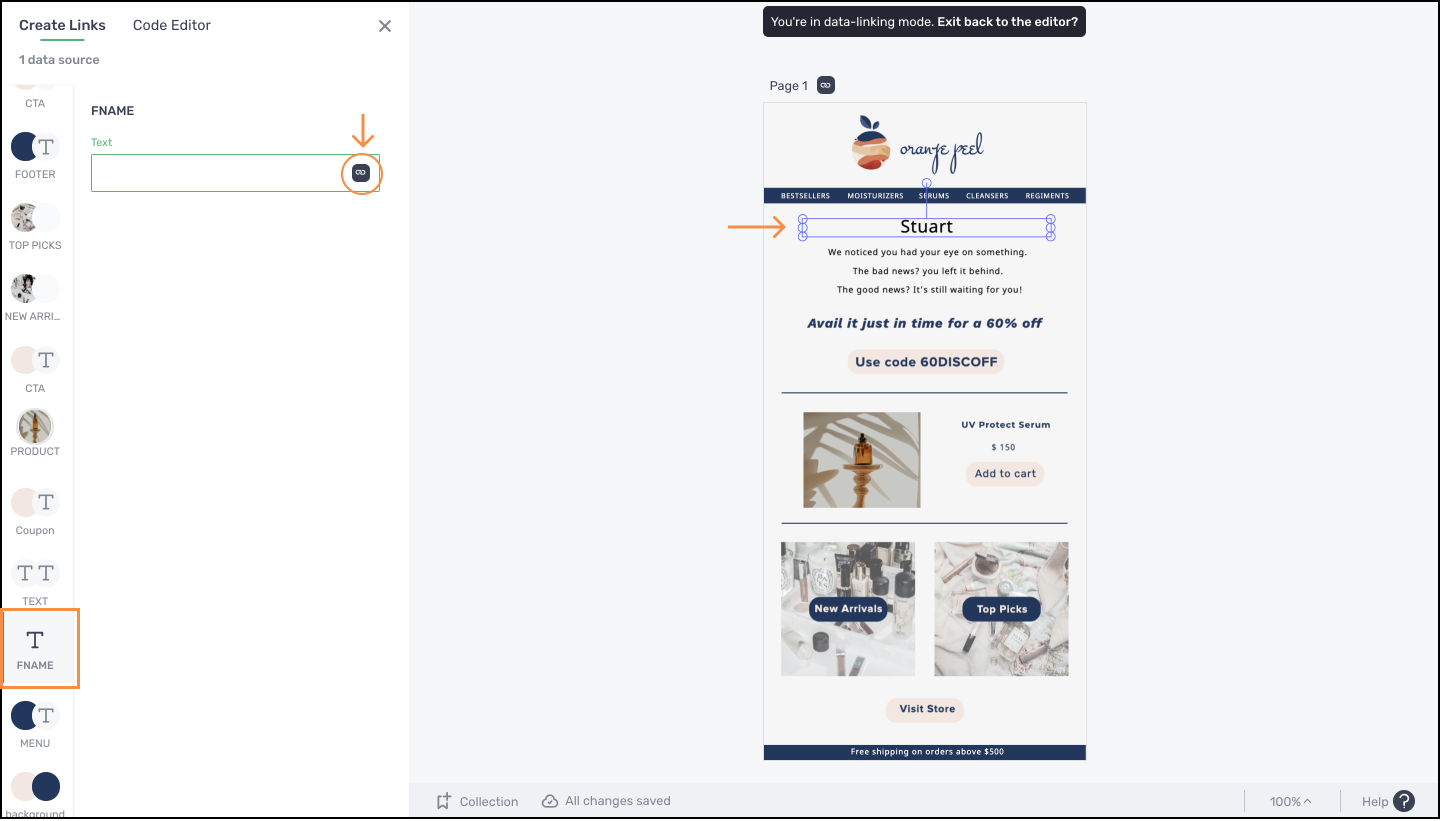
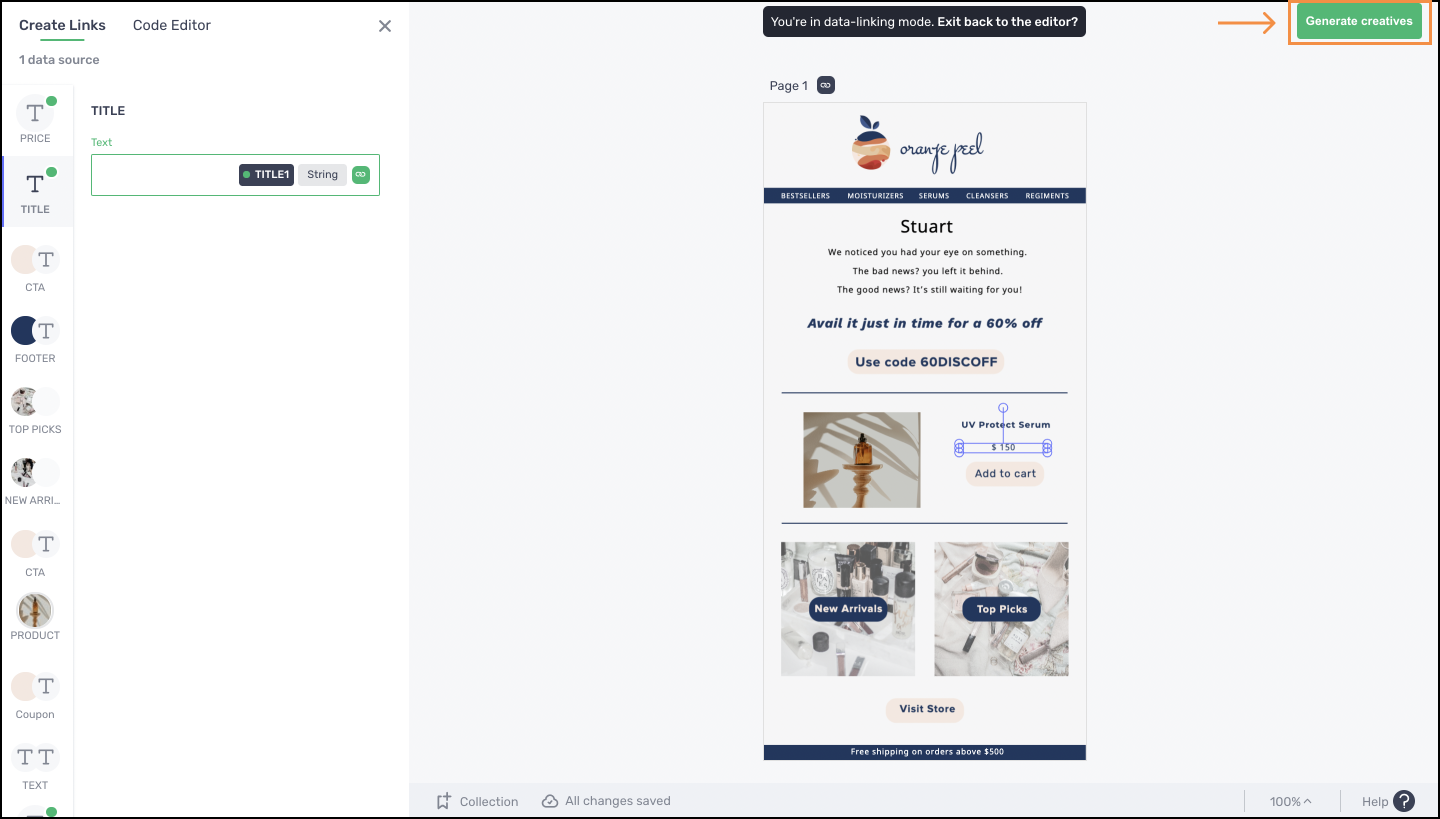
once done, head over to the data linking mode. Here you can start linking the audience fields (basically the customer/user attributes with the corresponding layer/element of your creative through the following steps:
-
Click on the layer you want to link on the sidebar and then click on the 🔗 icon.
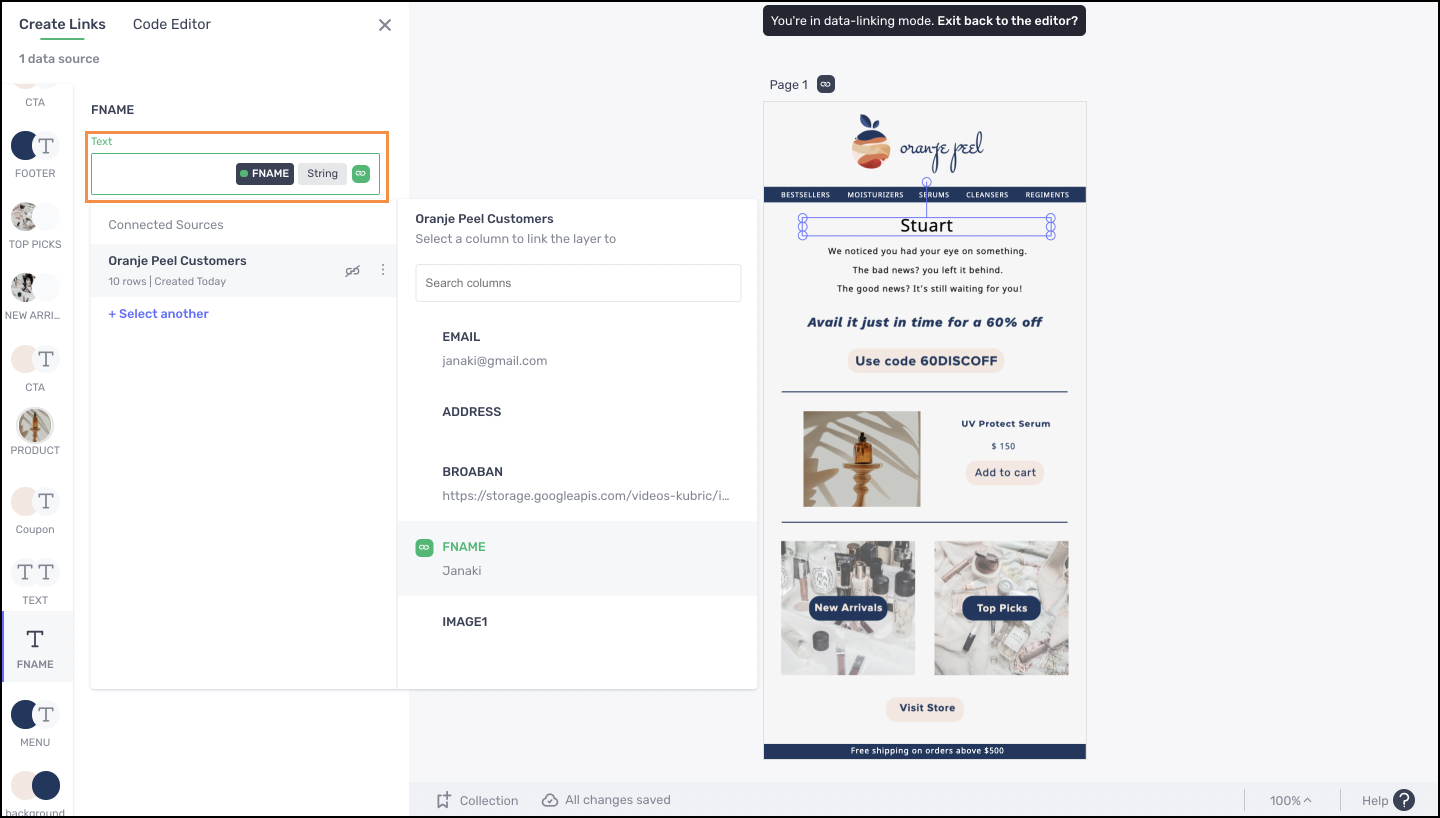
- Now click on the column you want to link in the dialog box that has the list of all your audience fields.
- Once linked, the audience field name is shown in the textbox along with the green link icon indicating that the selected layer has been linked.
- Repeat the above 3 steps for other layers/elements you want to link before you hit the Generate creatives button to initiate the bulk generation process.
Google sheets 🤝 Mason
🔗 To connect a Google sheet
🔗 To connect a Google sheet- Open the project and navigate to the base creative page.
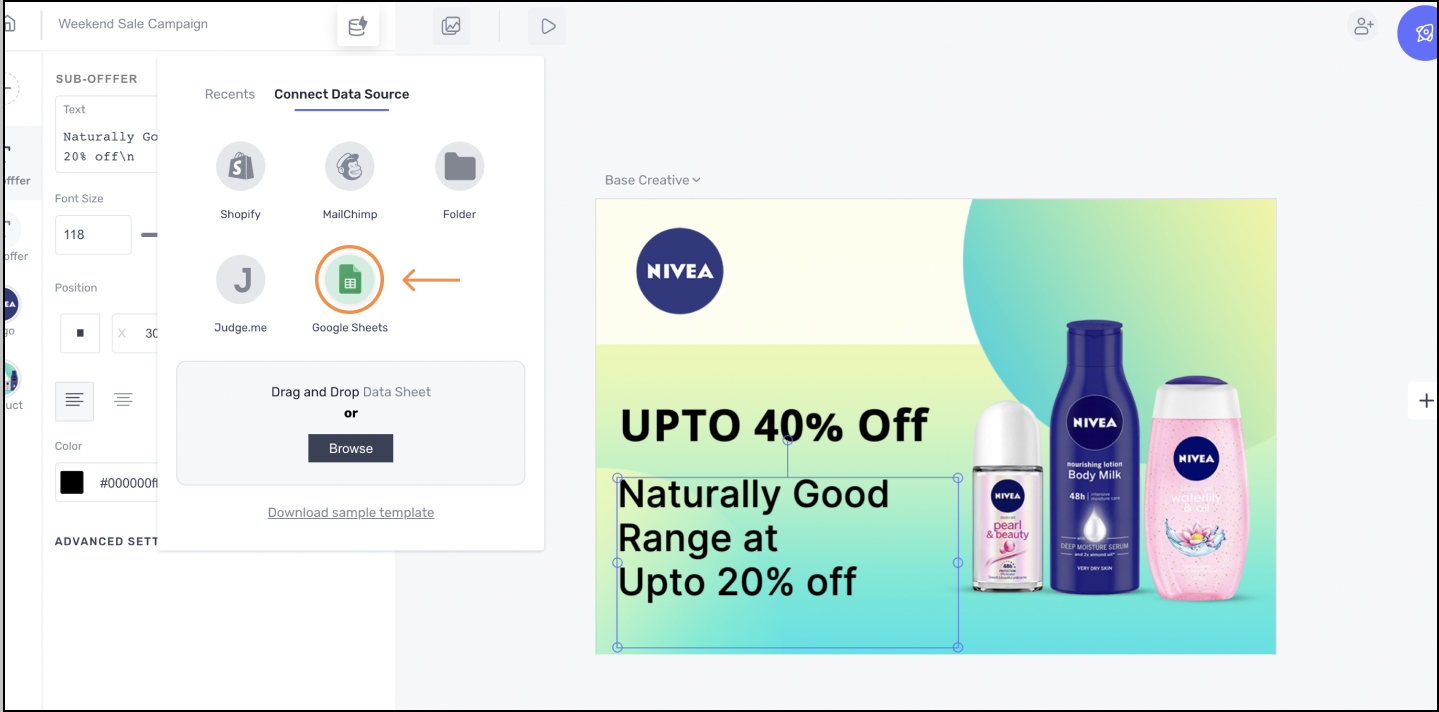
- Click on the Data connector icon and select Google Sheets in the modal
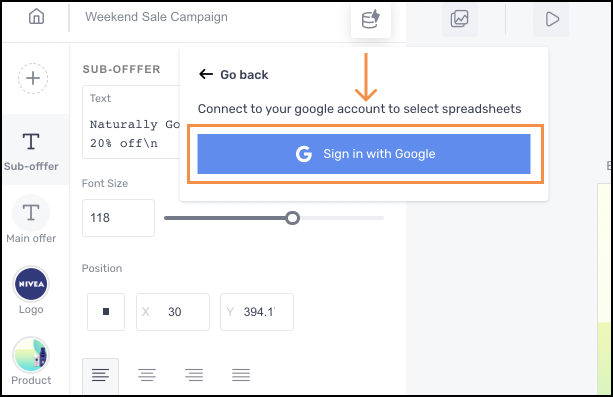
- Now click on the Sign in with Google button and select your Google account.
- Click on the Allow button to grant Mason access to your Google account.
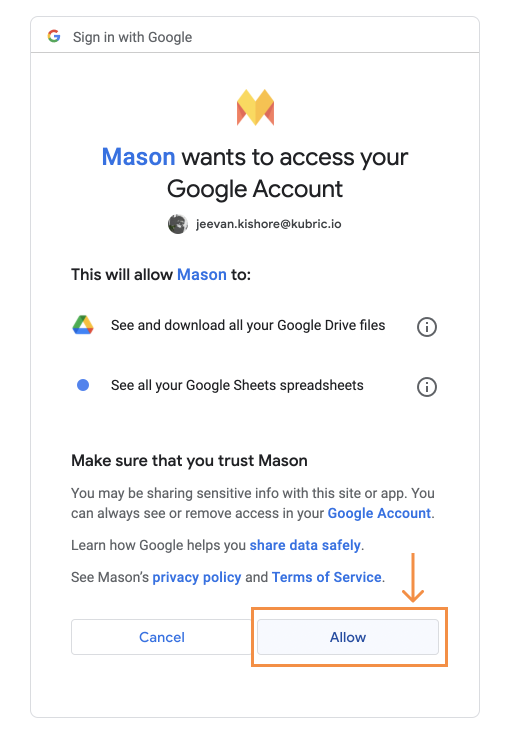
- After connecting your account, click on the Data connector icon once again and select Google Sheets in the modal
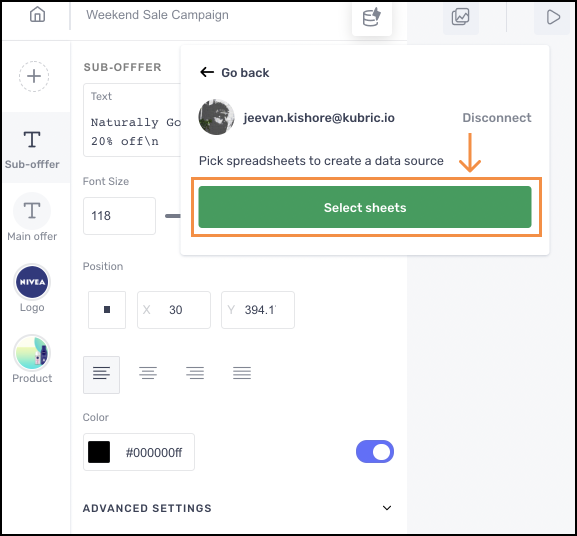
- Click on the Select Sheets button, choose a sheet that you want to connect to your project creative in Mason and then click on the Select button.
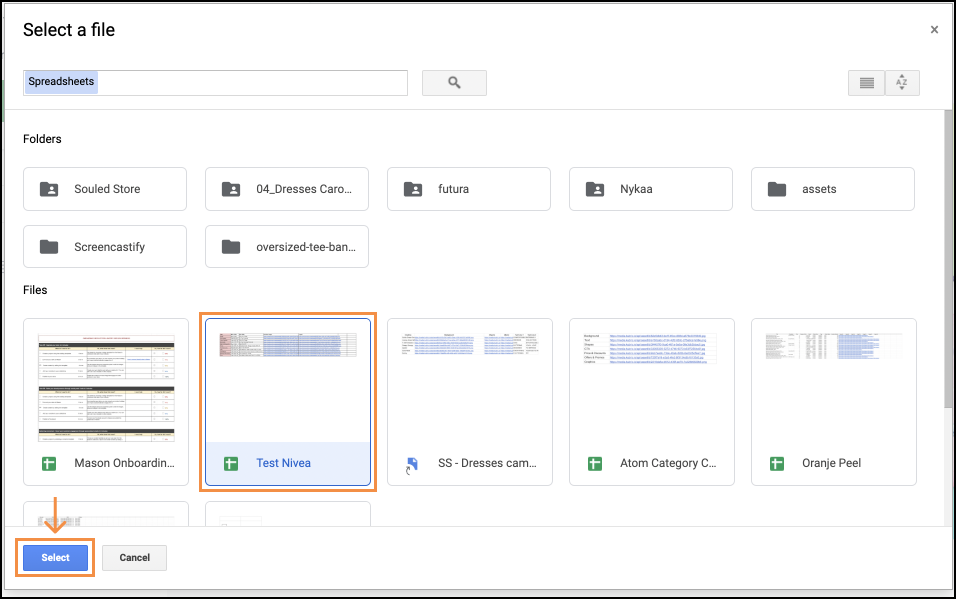
Your Google sheet is now connected successfully. Start linking the columns in the sheet with the corresponding layers/elements in your project creative now.
Pro tip
- For generating creatives in bulk, each row in your google sheet will have data related to each creative.
- You have to link the columns in your Google sheet to the corresponding layers/elements in the creative in Mason.
- So, to avoid any confusion, please ensure that the column headers in your Google sheet and the layer names of your creative in Mason are the same.
Connect Judge.me reviews
coming soon
Updated 5 months ago
